To lip sync animation from a character image, finish the voice recording first, choose artwork with a clear mouth, and generate a short video driven by that audio in Lip Sync Animation. Review the result while listening to the recording, then adjust the image or audio before making a longer scene.
This guide walks through a character image and audio recording for a cartoon host, an illustrated narrator, or a short character performance. The output is a rendered video you can place into an edit. If your project requires individual mouth drawings and editable keyframes, use an animation workflow designed for that control.
See the reference image and animated result
This existing example from the Lip Sync Animation page pairs a character image with its generated performance. Compare the reference artwork with the moving face, then watch the mouth, eyes, and character outline while the audio plays.
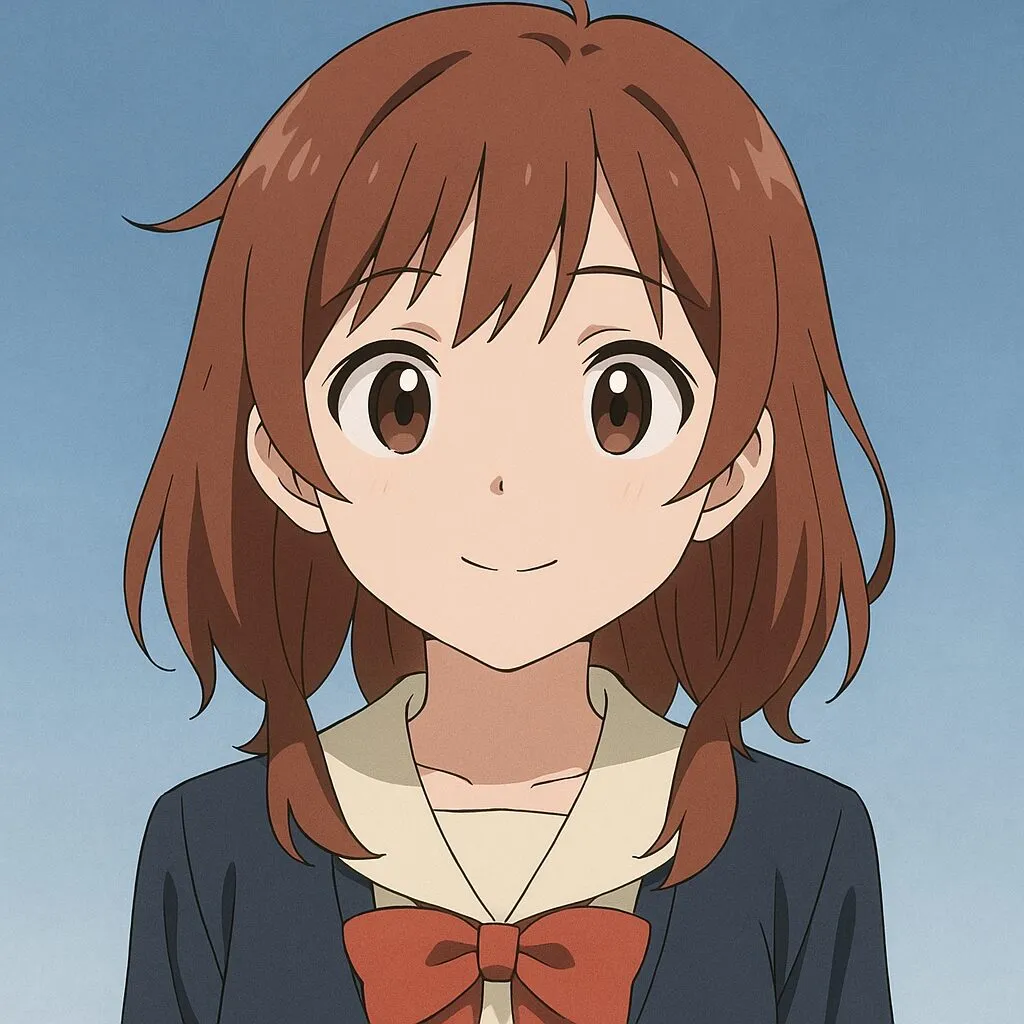
The notebook dialogue below is an original practice line for your own test. It is separate from this existing Lip Sync Animation example.
Let the recording set the performance
A lip sync scene starts with how a line is spoken. The same sentence can be hesitant, excited, or sarcastic. The pauses and emphasis change with the delivery, even when the words stay identical.
Record the complete line before generating. Listen for clipped beginnings, missing final consonants, harsh background noise, and accidental pauses. Leave a little breathing room around the performance so the first sound and the last word remain intact. Keep deliberate silence if it belongs in the scene.
You can also prepare speech through the available Text to Speech tools. Listen to the finished audio before selecting it for the animation. Correct a name or an awkward phrase there, rather than relying on a motion prompt to fix pronunciation.
For a singing character, supply audio that already contains the sung vocal. A spoken TTS recording supplies speech timing and delivery. The talking and singing photo guide explains how to choose between those two kinds of audio.
For an original practice scene, try recording this line in a curious, slightly worried voice.
Please bring my blue notebook. I left it beside the window. Wait, did the wind take it?
The first sentence includes several moments when the lips come together. The pause after “window” gives you a place to check whether the mouth relaxes between lines. Use it as a practice line for your own test.
Choose a character image you can judge clearly
Start with one character whose face is large enough to inspect. A front-facing or gentle three-quarter view gives you a clearer view of the mouth than a strong profile. Keep hands, microphones, scarves, and hair away from the lips for the first attempt.
For a 2D character, look for a clear relationship between the face, jaw, and mouth. A tiny line for a mouth may be difficult to assess in a wide composition. Crop closer or use a version of the artwork that shows the face more clearly. Keep enough room around the head for the framing you need.
A 3D-rendered character can use the same image-and-audio route. Export a still image from your design or scene, then use that as the reference. Keep the original project if you also need to animate the character inside your 3D software later.
Treat heavily stylized faces as a testable choice. A human-like face, a beak, and a featureless mascot ask for very different mouth behavior. When the design is unusual, test the exact artwork before building a whole episode around it.
For the notebook exercise, use a single illustrated librarian or student against a simple background. Make the character's face the focus, with room around the head for any crop you need in the final edit. Once the performance works, you can decide how much of the surrounding scene to include.
Generate the first dialogue shot
Open Lip Sync Animation and sign in. The page opens on Lip Sync Image (Max 10 min, speaker control). Under Advanced settings, it offers a Control Who Speaks (Optional) mask and an optional prompt. You can use it for a single character or mark one speaker in a group image.
For a performance directed through a required prompt, Lip Sync Image (Max 5 min, expression & motion control) opens the AI Avatar Video Generator. Add your character image and audio on that tool page. Both workflows take the same kinds of inputs. Check the controls and input limits shown for the one you select.
- Under Upload, Generate, or Edit Photo, upload your finished character image.
- Under Upload Audio or Generate Audio, upload or select the final recording.
- Confirm the character image and play the attached audio all the way through in the workspace. Check that it is the right take, names sound correct, and the opening and closing words are intact.
- If you selected the expression-and-motion workflow, enter its required performance prompt. The notebook example below gives you a starting point.
- Choose an available resolution appropriate for the test and check the input requirements.
- Check the visibility setting and displayed credit estimate, then generate the clip. Preview and download the finished video from its result card or My Creations.
Use a short complete line for the first generation. The notebook script is long enough to include changing sounds and a pause, while keeping the review focused. After that line works, try the longest or most expressive line in your actual scene. That helps you assess a harder case before generating all the dialogue.
In the expression and motion workflow, a short prompt for the notebook scene could be the following.
A curious illustrated librarian speaks to the viewer with restrained head movement. Their expression becomes gently surprised during the final question. Keep the framing steady.
The audio still supplies the spoken line. Use the prompt to describe the intended visual performance and inspect whether the output follows it. Keep the first prompt simple enough that you can tell which change helped.
Check the lips, pauses, and character together
Play the result at normal speed first. The scene should feel like one performance, with the voice and visible character working together. Then replay specific words and pauses that look uncertain.
For “Please bring my blue notebook,” look at the moments around the b and m sounds. These sounds are useful reference points for lip closure. The exact shape depends on the artwork, and a convincing animated performance does not need to exaggerate every sound equally.
During “I left it beside the window,” listen for the rhythm of the whole phrase. A mouth that seems busy while the voice pauses can be more distracting than a subtle shape on a fast syllable. At the final question, check whether the expression supports the delivery without obscuring the face.
Watch the rest of the image too. Look for changes to the character's eyes, outline, clothing, and background. If your artwork includes a badge or text, inspect it across the clip. Assess those details before adding captions, sound effects, or a final crop in an editor.
Change one thing when the performance falls apart
| Problem | A useful next attempt |
|---|---|
| The mouth is hard to see | Use a closer crop or a clearer version of the character art. |
| The first or last word is cut short | Listen to the audio file itself and restore the missing beginning or ending before regenerating. |
| The character moves more than the scene needs | Try a restrained performance prompt in the expression and motion workflow, then inspect the new output. |
| A stylized mouth behaves unpredictably | Test a more readable version of the same design with the same recording. |
| An unclear word produces an awkward moment | Re-record that phrase or correct it in the speech-generation step. |
| The wrong character speaks in a group image | Open Advanced settings in the speaker-control workflow and use Control Who Speaks, or prepare a single-character crop. For a two-person exchange, use the dedicated two-speaker workflow. |
In the speaker-control workflow, the Control Who Speaks mask selects the speaking region. White selects the character or area that should speak, and black excludes it from that selection. Upload the source image before creating the mask. Treat it as a speaker-selection control, and check the rest of the output for movement too.
If the whole scene is still inconsistent, return to the simplest version. Use one character, one clear line, and one uncomplicated reference image. Compare that output with the more elaborate version to identify what became difficult.
Build a conversation from reviewed shots
For a single-character monologue, keep the same reference artwork and approved voice across the next lines. Review each shot before assembling the scene. Save the original recordings and the image so you can return to them when a line changes.
For two characters in one image, use a workflow that accepts separate role audio. The two-person podcast tutorial explains how to keep the tracks aligned and preserve the silence between turns. Another option is to generate a shot for each character and assemble the exchange in a video editor.
The animation page also includes this two-speaker example. Watch which character speaks during each turn and what the other character does while listening. The two-role setup uses one audio track for each speaker.
Projects that need frame-level mouth edits have a different production requirement. Adobe Animate, for example, maps mouth poses to visemes and generates keyframes from an audio layer. Read Adobe's guide to that editable workflow.
Before exporting your finished edit, play every transition with the dialogue. Confirm that the voice starts with the intended shot, the character stays recognizable, and the pauses give the scene room to breathe. If a transition feels wrong, check the cut and the pause around it. Regenerate the affected line only when the performance itself needs to change.
Start your own dialogue shot in Lip Sync Animation with the character image and recording you have prepared.